> ## Documentation Index
> Fetch the complete documentation index at: https://stackone-hub-docs-confluence-api-token-update.mintlify.site/llms.txt
> Use this file to discover all available pages before exploring further.
# Qlik - OAuth Authentication
> Follow these steps to connect Qlik via the StackOne Hub successfully.
Ensure you have Admin privileges within your Qlik Cloud.
If you've been directed to StackOne to integrate with Qlik, the following steps will help you understand the process and any necessary actions to configure successful integration.
## Get Your Qlik Tenant
Log in to your [Qlik Cloud](https://qlikcloud.com/). Your Tenant is found in the URL.
 Given the URL: `https://my-tenant.eu.qlikcloud.com/hub`
The Tenant is `my-tenant`.
## Get your Qlik Client ID and Secret
Click on the Launcher menu button at the top right corner and select `Management Console`.
Given the URL: `https://my-tenant.eu.qlikcloud.com/hub`
The Tenant is `my-tenant`.
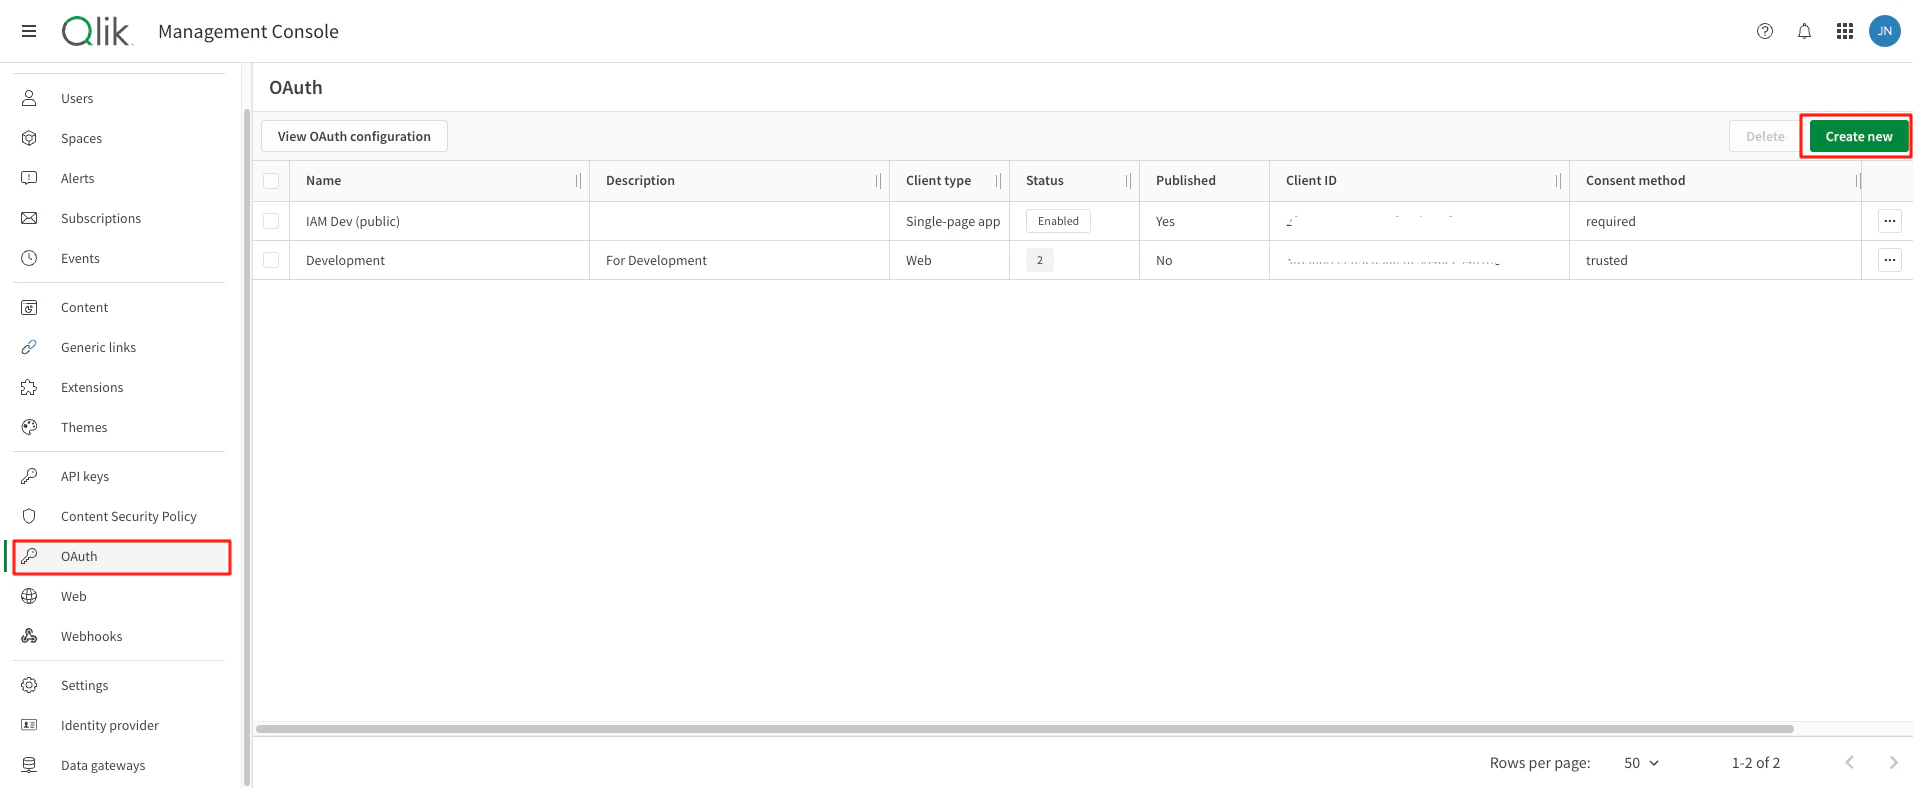
## Get your Qlik Client ID and Secret
Click on the Launcher menu button at the top right corner and select `Management Console`.
 Go to `OAuth` from the left menu and click on `Create new`.
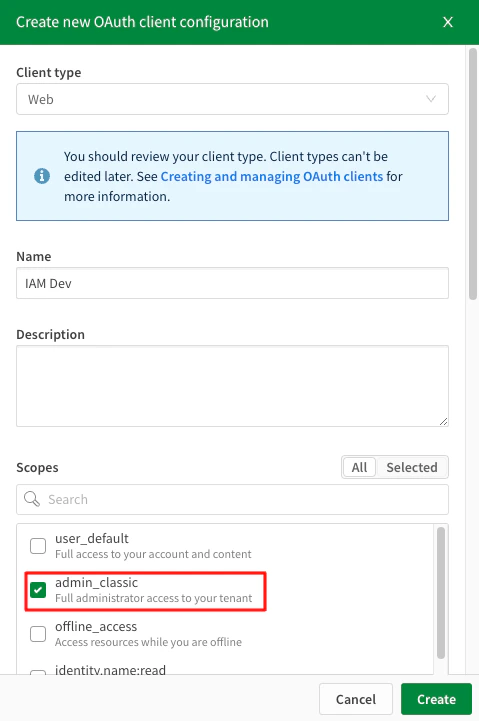
 Select Client type and enter the new OAuth client name and description. Then check the box next to `admin_classic` scope from scopes list.
 Enter redirect URL and click on `Add` button. It should be listed below in `Redirect URLs` section.
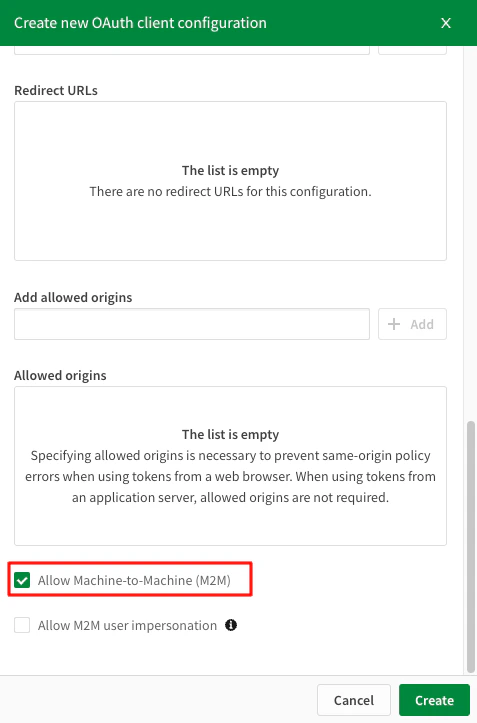
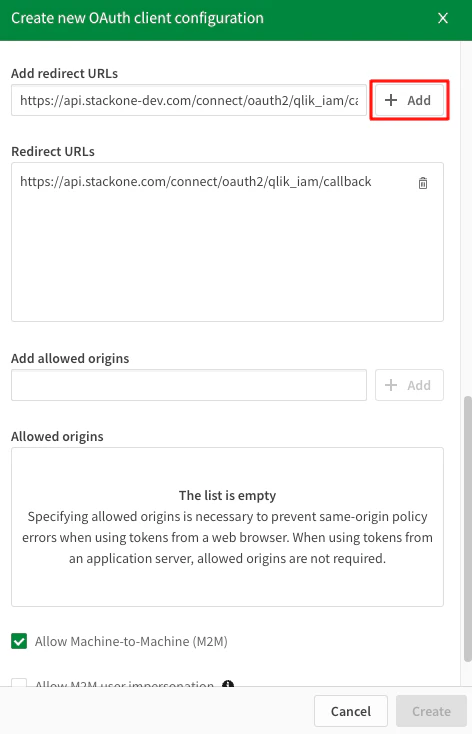 Scroll down and check the box next to `Allow Machine-to-Machine (M2M)` and click on `Create` button.
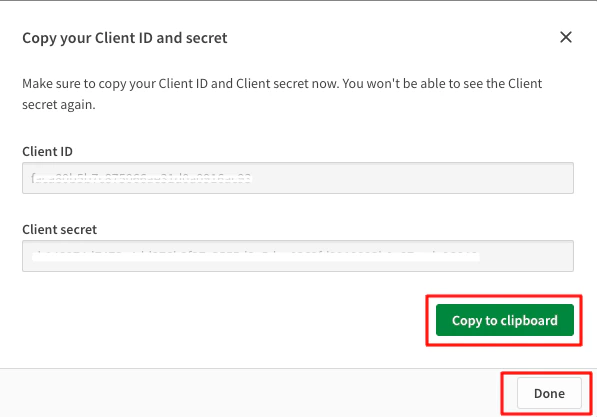
 Copy your Client ID and Secret to a safe place by clicking `Copy to clipboard`. These will be used in the next step. Click Done in the bottom once complete.
 ## Change consent method
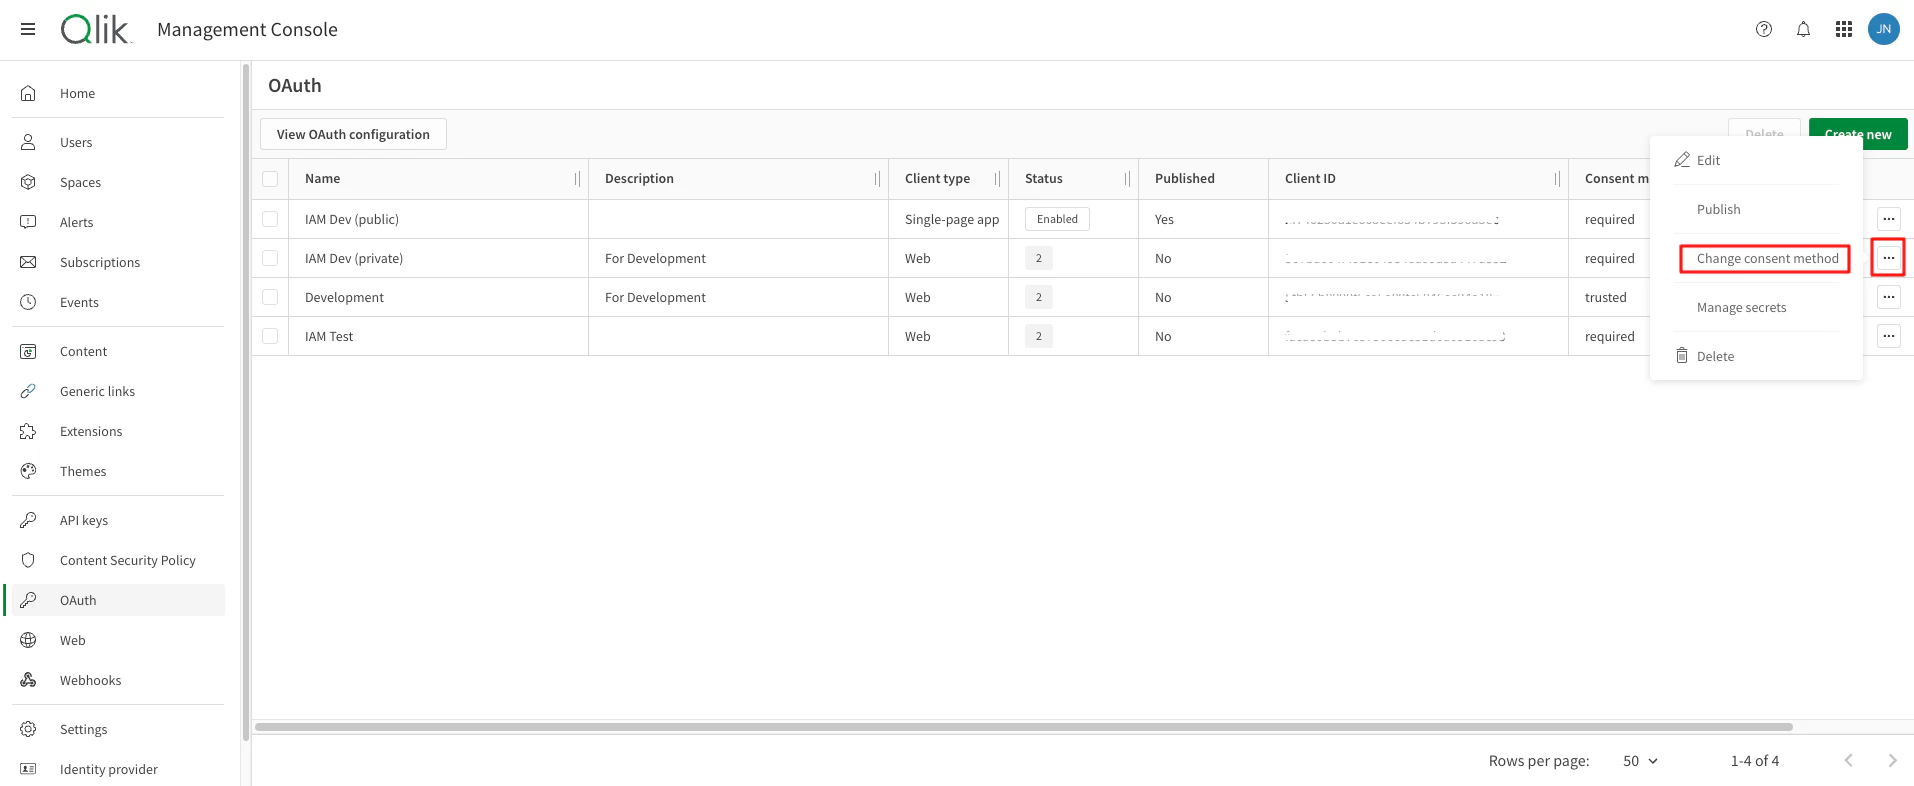
Click on the edit button next to your Oauth client and select `Change consent method`.
## Change consent method
Click on the edit button next to your Oauth client and select `Change consent method`.
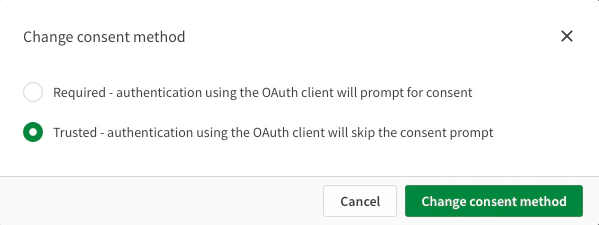
 Select the `Trusted` radio button and then click `Change consent method`.
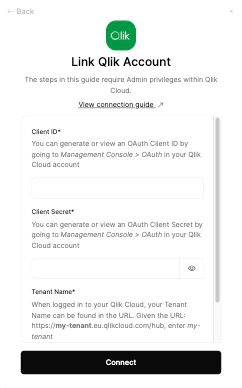
 ## Connecting with StackOne
Upon reaching the Link Account page, enter the Client ID, Clients Secret and tenant name from the previous steps and proceed by clicking the Connect button.
## Connecting with StackOne
Upon reaching the Link Account page, enter the Client ID, Clients Secret and tenant name from the previous steps and proceed by clicking the Connect button.
Congratulations, you're all set! If you face any issues with the steps mentioned above,
please contact us by emailing [integrations@stackone.com](mailto:integrations@stackone.com). We're always here to assist you!
## Available data
This integration has the following [IAM Resources](https://docs.stackone.com/reference/iam_list_users) available from the provider:
## Useful Links
[https://qlik.dev/authenticate/oauth/](https://qlik.dev/authenticate/oauth/)
[https://qlik.dev/authenticate/oauth/create/create-oauth-client/](https://qlik.dev/authenticate/oauth/create/create-oauth-client/)