> ## Documentation Index
> Fetch the complete documentation index at: https://stackone-hub-docs-confluence-api-token-update.mintlify.site/llms.txt
> Use this file to discover all available pages before exploring further.
# Asana
> Follow these steps to connect your Asana account with StackOne hub, ensuring a smooth integration process.
The following guidance assumes you have Admin privileges for your Asana
account.
## Generating a Personal Access Token
Sign in to your account, you will need email and password to log in.
Click on your profile picture in the top right corner, then select Settings from the dropdown menu.
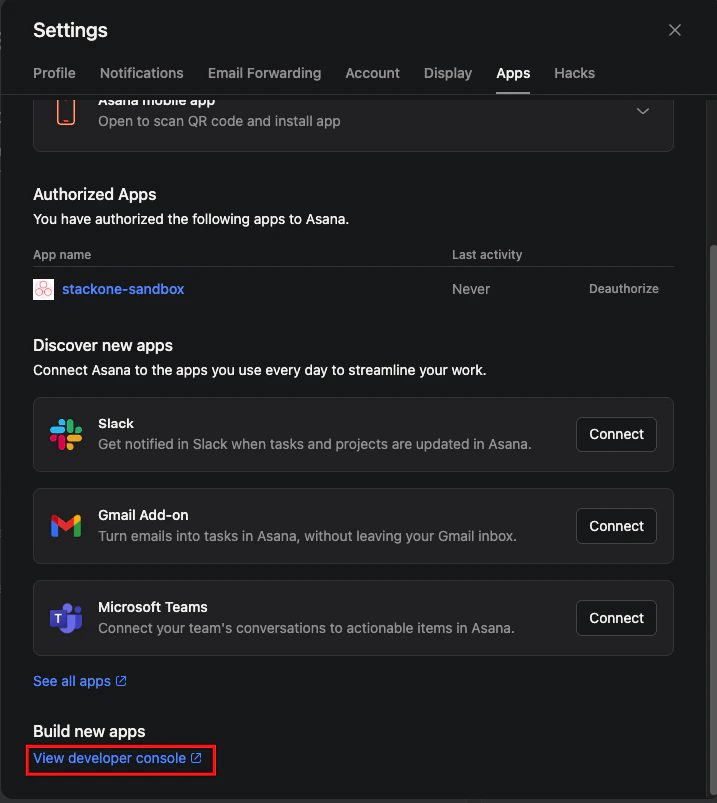
In the Profile Settings dialog, navigate to the Apps tab.
Scroll down to the bottom of the Apps tab and click on the View Developer Console link. This will take you to the Developer App Console.
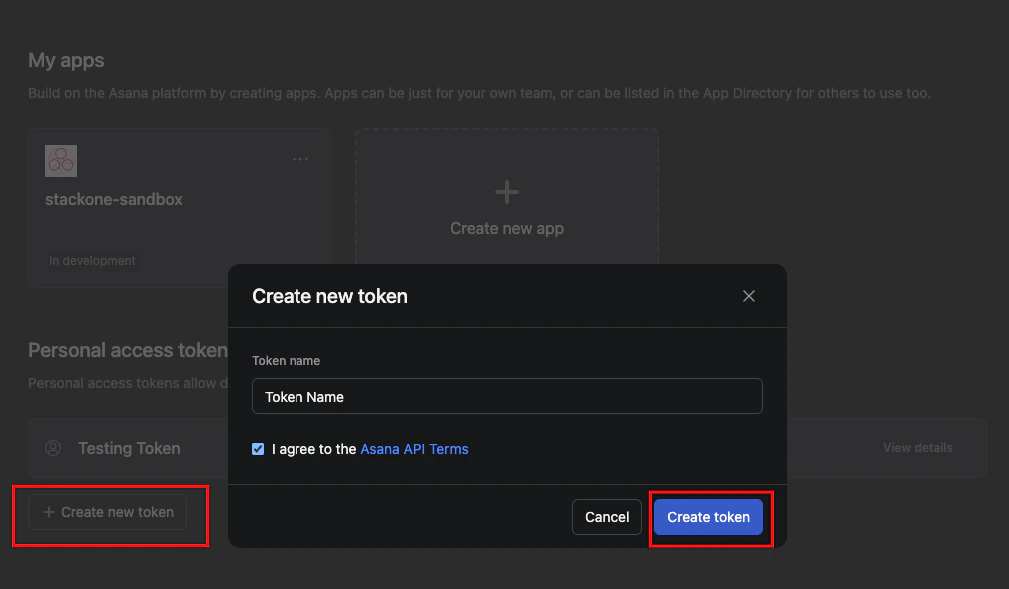
 In the Developer App Console, click on the + Create New Token button under the Personal Access Tokens section.
In the dialog that appears, enter a name for your token (e.g., "StackOne Integration") and click on the Create Token button.
Once the token is generated, it will be displayed on the screen. Make sure to copy it immediately, as you won't be able to see it again.
In the Developer App Console, click on the + Create New Token button under the Personal Access Tokens section.
In the dialog that appears, enter a name for your token (e.g., "StackOne Integration") and click on the Create Token button.
Once the token is generated, it will be displayed on the screen. Make sure to copy it immediately, as you won't be able to see it again.
 ## Use the Personal Access Token in the StackOne Hub
Once you have copied the Personal Access Token, you can use it in the StackOne Hub to connect your Asana account.
This will require the Personal Access Token you just generated and the workspace ID.
Go to the StackOne Hub and navigate to the Accounts section and click on the Link Account button.
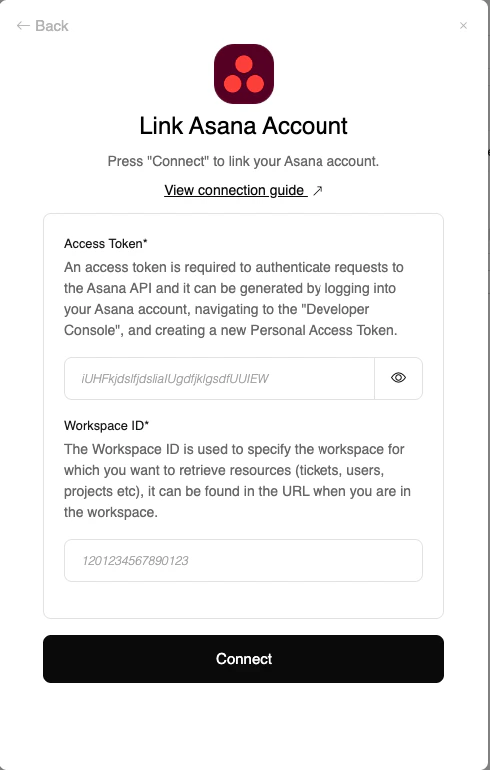
Select Asana from the list and fill in the required details - Personal Access Token and Workspace ID.
Click on the Connect button to save your settings and establish the connection with Asana.
## Use the Personal Access Token in the StackOne Hub
Once you have copied the Personal Access Token, you can use it in the StackOne Hub to connect your Asana account.
This will require the Personal Access Token you just generated and the workspace ID.
Go to the StackOne Hub and navigate to the Accounts section and click on the Link Account button.
Select Asana from the list and fill in the required details - Personal Access Token and Workspace ID.
Click on the Connect button to save your settings and establish the connection with Asana.
Congratulations, you're all set! If you face any issues with the steps mentioned above,
please contact us by emailing [integrations@stackone.com](mailto:integrations@stackone.com). We're always here to assist you!
## Useful Links
[https://developers.asana.com/docs/personal-access-token](https://developers.asana.com/docs/personal-access-token)